Online Help > Placemarks > Paths
How to manually draw a path?
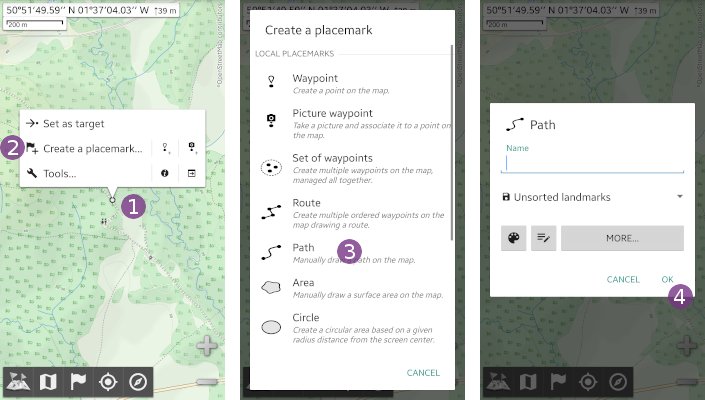
- Tap on the screen center dot
 and on
 “Create a placemark…” ;
; - Select
“Path” ;
; - If you want, type a name in the
“Name”text field, or change the place where to save the track; - Tap
“Ok” .
.

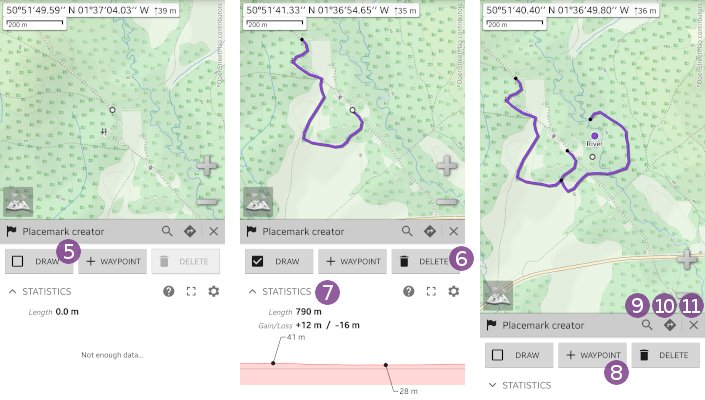
The track edit mode is activated, you can now:
- Move the screen center dot over the start location, tap
“Draw” to activate the drawing mode and move the screen center dot along the path you want to draw;
 - If needed, tap
“Delete” multiple times to delete the last locations in the backward direction.
As you draw the path, the statistics update in the below panel. In case you've the DEM elevations turned on, the elevation profile is also displayed. If you need more space, tap “Statistics” ![]() to hide the statistics panel.
to hide the statistics panel.
If needed, you can:
- Deactivate and reactivate the drawing mode multiple times to draw distinct path segments;
- Tap
“+ Waypoint” to add waypoints associated to the path;
 - Tap
“Search a location” to jump to remote locations by name or coordinates;
 - Tap
“Auto-routing” to activate the auto-routing mode.
When you have finished, tap “Close” ![]() to save your path and exit from the edit path mode.
to save your path and exit from the edit path mode.

How to split or edit points of a path?
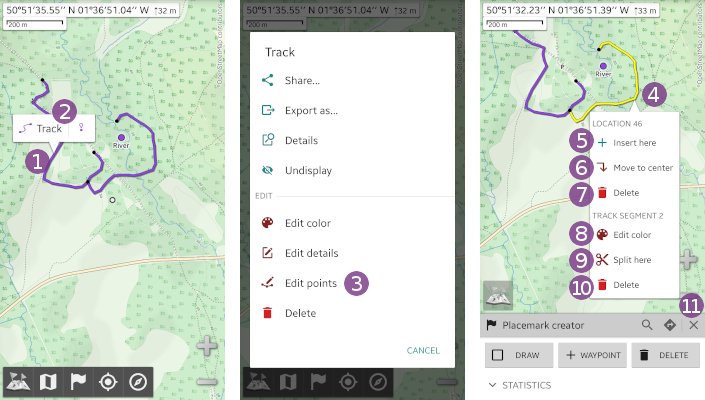
- Tap anywhere on the path
 and on its name
  ;
; - Select
“Edit points” to activate the edit path mode.
When you tap on any location ![]() , an edit menu is displayed allowing you to make various actions on the selected location:
, an edit menu is displayed allowing you to make various actions on the selected location:
“Insert here” to insert new locations from here;
“Move to center” to move this location on to the screen center;
“Delete” to delete this location.
Or on the path segment that contain the selected location:
“Edit color” to change the color of this particular segment (it will override the track color);
“Split here” to split this segment into two different segments at the selected location;
“Delete” to delete the entire segment.
When you have finished, tap “Close” ![]() to save your path and exit from the edit path mode.
to save your path and exit from the edit path mode.
